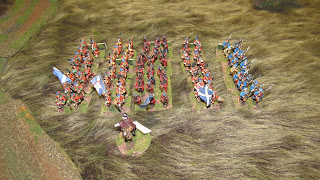
Sunday, August 27, 2023
Home made timber building
Wargame buildings are expensive. That being the case, I thought I would try my hand at scratch building a 25mm timber building for my upcoming Jacobite Rebellion project. The finished product cost me about a dollar in materials. I think it turn out pretty well for a first effort. I just used long reach matches, cardboard packaging, and a mixture of white glue and light weight spackling. Using super glue proved very helpful in speeding up the process. Let me know what you think. Any suggestions?
Friday, August 25, 2023
Jacobite Collection Broken int Lots
I will try a different approach to make this beautiful collection more accessible. I have broken the collection into lots. Pictures of all 15 lots are posted.
Lots 1-7 are government troops, 8-15 are Jacobite. Prices are listed with postage additional. All reasonable offers for multiple lots will be considered.
Lot 1- 4 x 24 battalions (96 figures) and two guns plus officer $220
Lot 2- 3 x 24 battalions (72 figures) and one gun plus officer $150
Lot 3- 4 x 24 battalions (96 figures) plus officer $200
Lot 4- 4 x 24 battalions (96 figures) and two guns plus officer $220
Lot 5- 5 battalions of Government Highlanders (88 figures) plus officer $180
Lot 6- 2 x 12 regiments dragoons (24 figures) plus officer $80
Lot 7- 2 x 12 regiments dragoons (24 figures) $75
Lot 8- 4 regiments of highlanders (68 figures) two guns plus officer $175
Lot 9- 2 x 16 regulars (32 figure) one gun plus officer $75
lot 10- 5 x 4 units of cavalry (20 figures) plus officer $65
Lot 11- 4 regiments of highlander (84 figures) two guns plus officer $210
Lot 12- 4 regiments of highlanders (78 figures) two guns plus officer $200
Lot13- Atholl Brigade 3x16 (48 figures) $110
Lot 14- 5 regiments of lowlanders (68 figures) plus officer $160
Lot 15- 5 regiments of lowlanders (92 figures) plus officer $215
The pictures are in order, from lot 1 to 15
Sharp Practice AWI: Defend the Bridge, conclusion
On turn 11, the Continentals unleash a rather ineffective volley on the British regulars. Not much else happened before the Tiffin card turned up.
Turn 12-In a startling turnof events, Lieutenat Westbrook's two groups charge into cntact with Seargent Rothwell's Continental skirmishers. The hand-to-hand fighting is vicious. Remarkably, Rothwell's men are able to fend off the charge and drive Westbrook's men back.
Lieutenant Richards' medium gun fires again, and again its effect is pitiful. Seargeant Billings' riflemen filter through the trees and are able to add their fire ontoMajor Winthrop's formation.
The turn ends with Lieutenant Harper urging his loyalist infantry down the road to add support to Westbrook's faltering men.
Turn 13- On this, and the following three turns, the Tiffin card came up early. The battle was clearly drawing to a close. Could the British make any headway in the gloaming of the day?
Sergeant Cox cajoled his light infantry into a small wood to bring fire on the rebel militia. On the other end of the field, Captain Jones's two groups of state troops break into a line to add their numbers to the defense.
Turns 14, 15- Only one card was drawn on turn 14 before the Tiffen came up. On turn 15, the British saw their cards come up, allowing them to blaze away at the shadowy figures across from them. One group of Hampton's militia is forced back due to excessive shock. This breaks the formation. The resulting moral rolls see the rebels status drop by two points.
Turn 16- Darkness has fallen and the game draws to a close. Lieutenant Harwood's militia men fire at Conway's grenadiers. In the failing light, only two shock result. Winthrop's men fire on last volley, inflicting a casualty and more shock on the rebel gun, forcing it to withdraw, reducing the American morale one more point. It is the last action of the night.
The morale of both sides had fallen to six. Despite all their efforts, the British were not able to break the American line. It was a tactical victory for the rebels, though at a tremendous cost.
Tuesday, August 22, 2023
Sharp Practice AWI: Defend the Bridge! Continued
Turn six was relatively quiet as both sides feverishly attempted to get units into the action. Lee's Continental dragoons were able to take cover behind Hampton's militia men. In what would prove to be a significant event,Lieutenant Cooper crept through the woods on the rebel right. He was now on the flank of the unsuspecting farmers and shopkeepers defending the bridge.
On turn 7, Cooper's card came up early. He ordered his men to fire. When the smoke cleared little damage appeared to have been done, but a closer look revealed that the lone casualty was Major Hampton who had been knocked unconscious.
Elsewhere, various units continued to move towards the action. Harrod'd Continentals were conspicuously sluggish in their advance. They even cashed in four cards to get and extra movement and tossed double ones!
The Tiffin card came up after only a few cards had been drawn. However, the Americans used their one flag to activate Captain Harrod's Continentals who were finally on the line. They presented and fired at Cooper's skirmishers in the woods with telling effect. With the loss of three men and the addition of five shock, Cooper was forced to pull his men deeper into the woods for safety.
Subscribe to:
Comments (Atom)


