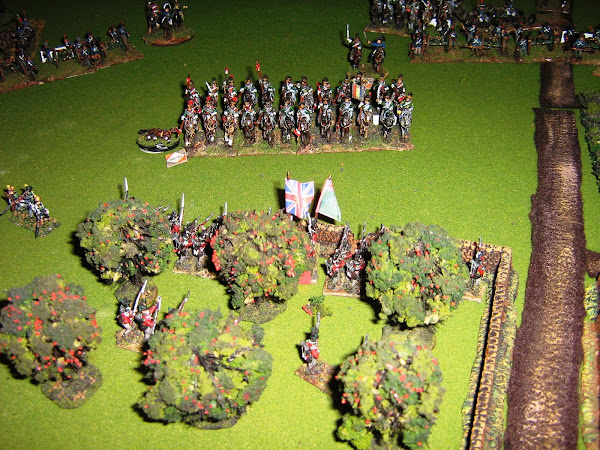

It doesn't seem very Christmassy here in Southern California today. It's in the mid 70s and downright hot out in the sun. Be that as it may, it is still a joyous time of year. I am thankful to God of this many blessings: good health, abundant provision and a loving family.
Most of my hobby time of late has been devoted to painting for others. I enjoy this and hope to add other commissions in the year to come. It seems one man's pain is another man's pleasure.
I wish all of you who have visited my blog over the years a wonderful New Year. I am close to 25,000 views. Perhaps by the end of the year!
Tuesday, December 24, 2013


Saturday, December 14, 2013
Regimental Fire and Fury Game
Despite the crush of the holidays, I opted to put on a game of Regimental Fire and Fury for a few of my students. The battle was a fictional affair that takes place in the fall of 1862. Abner Doubleday's division has been given the task of securing passage over a bridge held by D.H. Hill's Confederates. The Yankees held a numerical advantage, four brigades versus three, and surpassed the men in butternut in artillery as well, nine guns to six.
The Union players were aggressive, knowing that they only had a little time (two and a half hours of game time) to secure their objective. There were two player marshaling the forces of the northern cause. One took Phelps's and Gibbons' brigades plus a battery to attack the rebel right flank. The other commander pressed on with Patrick's brigade and Hoffman's in support to engage the Confederate left.
The first blood was drawn by the skirmishers of Phelps' brigade as they pressed in on Ripley's unit. The young brigadier playing the part of Ripley responded with vigor. In the end, it proved to be excessive. Skirmish lines blazed away and a considerable number of 10s were rolled, meaning that units ran low on ammunition quickly. Rolls were taken to see if commanders were hit, but the good Lord seemed to be watching over them this day as bullets continually missed their mark.
Ripley's men were itching for a fight, so they charged out from their hasty works. One unit was stopped cold by intense musketry and another didn't roll high enough to close with a battery of Union artillery. Over the next two turns both of these regiments were torn to pieces by concentrated rifle and cannon fire. To make matters worse, Gibbons' elite brigade came up to add its strength. By the end of the game, Ripley's regiments were all spent and having to fall back. The one bright spot came when a regiment of zouaves attempted a charge and ended up being broken due to a very unlucky dice roll. Other than that, the rebel right flank was pretty much destroyed.
On the other flank, Collquit's brigade also decided to charge as opposed to being decimated by cannon fire and musketry. Most of the units were armed with smooth bore muskets, and so they were at a disadvantage in a firefight. Collquit's charge drove back Patrick's brigade, but in the meantime, Hoffaman's men were able to form a second line supported by a battery of artillery. As the game ended, the rebs inflicted losses on the yanks, but were in turn battered themselves.
Anderson's brigade stayed put in positions near the bridge. Though they hadn't suffered any casualties, they would have been hard pressed to hold out against two fresh, veteran Union brigades. Additionally, despite being on the defensive, the rebels lost many more men than the attacking yankees did. The young Confederate commander's aggressiveness had a large price tag.
 |
| The bridge was the objective in this game |
 |
| This is Ripley's brigade, holding the right flank |
 |
| Anderson's brigade guarded the bridge |
 |
| This is Phelps' brigade advancing towards Ripley. |
 |
| Collquit's brigade, holding the rebel left |
 |
| Ripley's men are mowed down by cannister |
 |
| This is Patrick's brigade advancing on Collquit |
 |
| Two of the young commanders. They picked up the rules fairly quickly. |
 |
| Collquit's brigade's high water mark. Patrick's men have been forced back, but Hoffman's brigade is in position to stem the tide. |
 |
| A Union battery deployed for action |
 |
| A closer shot of Anderson's brigade |
 |
| The aftermath of Ripley's ill fated attack. |
Tuesday, December 3, 2013
Latest French addition
I have painted up another French battalion of 30 figures to accompany the Swiss battalion already painted. Only one of the shots that I took without flash turned out fairly decent. Here it is.


Tuesday, November 26, 2013
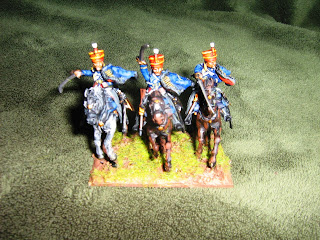
Victrix 15th Hussars
These are the Perry British Hussars painted up as the 15th regiment. Very colorful and a joy to paint.



Monday, November 18, 2013
Victrix French painted up as Swiss
I bought a box of Victrix 1809-1812 French infantry to round out my collection. I divided the box in half. I just finished a 30 figure battalion of Swiss to be followed by a 30 figure battalion of French. Though assembling these guys is a bit tedious, I do enjoy painting them. Here are a few shots of the Swiss.


Monday, November 4, 2013
Battle of Scheidlhausen, pt 2
I was able to fight through two more turns. It has had some fun twists and turns. On the Bavarian right, their chevau-legeres have thoroughly trounced their Austrian counterparts, despite being outnumbered.
Things are very different in the Bavarian center, however. The Austrian numerical advantage has been too much for the thinly deployed Bavarian brigade holding the line there. The supporting 12lb battery destroyed one Austrian battalion only to be flanked by another. To the left of this disaster, another Bavarian battalion has been routed by a determined Austrian assault.
Things have been slow to develop on the Austrian right, but that should change dramatically in the next turn. This is where the bulk of the Austrian corp has been posted with the objective to turn the Bavarian left. That blow will be delivered on turn six.
The Austrians have succeeded in their plan to draw off the Bavarian reserves as the French brigade is committed to fill the breach in the center. The Bavarians have a wood and a stone wall to aid their defense, but numbers should be the ultimate factor on this flank. I'll let you know what happens.
 |
| After turn four |
 |
| Turn five sees one Austrian hussar regiment retreat and the other is routed. Both Bavarian units retire behind their lines to reform. |
 |
| The Bavarian 12lb battery in the top center of the picture is in serious trouble. |
 |
| This shot is from behind the Austrian line. There is now a gaping hole in the Bavarian center. Some supporting French units can be seen in the top right rushing to try to stem the tide. |
 | |
| Massed Austrian columns are poised to deliver the telling blow against the Bavarian left. |
Saturday, November 2, 2013
Battle of Scheidlehausen
I am playing a solo fictional battle so that I can use my new Bavarians and Austrians. This fictional account is set in the 1809 campaign. An Austrian corp is trying to dislodge a division of Bavarians supported by a brigade of French and Swiss. There is a bridge that must be held. The Bavarians are deployed along a ridge that overlooks the stream. The Austrians have chosen to try to pin the Bavarian right flank with an attack by the light division. The heavy blow is to be delivered by two line divisions on the right. After three turns, the Austrians have come to grips with the enemy and have achieved a success in the middle of the line.
 |
| The Bavarian position |
 |
| The Austrian light division will attempt to pin down the Bavarian right. |
 |
| The Austrian attack goes in. Despite suffering heavy losses from both artillery and musketry, their morale holds |
 |
| Two Hungarian battalions overwhelm a Bavarian battalion. |
 |
| The cavalry mele on the Austrian left is a draw and will have to be resolved on the next turn. A supporting Bavarian cavalry regiment can be seen in the upper left of the picture. Another regiment of Austrian hussars is just out of the picture and will certainly be coming up in support the next turn. |
Subscribe to:
Posts (Atom)