Monday, July 11, 2016

Day One of SYW Campaign Game

We got off to a good start today in our mini campaign.  Despite the fact that the majority of the kids were new to wargaming and I didn't have my usual helpers, we got on fairly well.  The first hour and a half of the day was spent going over the rules, dividing into teams, and choosing brigades for the initial moves.  Each side was allowed up to 2,500 points in figures.
The Set Up

Cards were used to represent the various brigades until they came within 12" of an enemy card.  At that point, figures were placed on the table.  The Russians, who I assumed would take up defensive positions and do their best to hold their ground, took the initiative and sent two strong heavy cavalry brigades to attack the Prussian left flank.  The Russians didn't know this was the very point that all of the Prussian units would be entering from this day.  Needless to say, the Prussians were surprised.

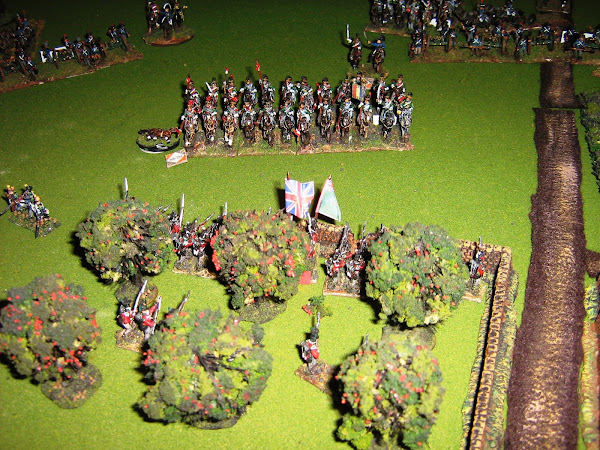
The Russian cavalry colunms.

The first charges of the game.  The Russians won one and the Prussians the other.

An overview of the action

The Prussians avoided disaster with some lucky dice rolls.  Their cuirassiers were able to turn toward the onrushing Russian heavy cavalry, otherwise they would have been hit in their flank and easily defeated.
Some of the young gamers involved.
In the following turns the Prussians were able to consolidate their position.  They were even able to rally a militia battalion that had been crushed by some victorious Russian horse grenadiers.

As the day was winding down, a Prussian brigade marched over a bridge to attack the Russian center. Cards were turned over and the Prussian commander was dismayed to see that two strong Russian infantry brigades, one supported by heavy cannons, were ready to receive him.  When the smoke cleared his leading battalion was reduced by 50 percent, yet it passed its morale check.  His jagers were able to cause casualties on both Russian batteries.  
Bevern's Brigade attacks over the bridge.

The Prussian left flank at the end of the first day.

The Russian center
After a short debriefing, the boys dispersed for the afternoon, all eager to return to the action tomorrow.

Sunday, July 10, 2016

SYW Mini Campaign Begins

Tomorrow is the first of two wargaming classes I will be overseeing at a summer camp in Manhattan Beach.  I have 11 students for tomorrow, but none of my helpers are available, so I'll be going it alone.  We'll see how that works.

This week will be a small SYW campaign.  An aggressive Prussian army will be attacking a smaller yet very determined Russian army.  My figures are based for the Die Kreigskunst rules.  The units have been given a point value based on their size and morale.  Both sides will be able to select brigades totaling up to 2,500 points.  The Russians, being the defenders, will have a lot more freedom in placing their troops initially.  The Prussians will be more limited.

The brigades will be represented by cards until they come into 12 inches of an enemy.  At that point the figures will be placed on the table.  I am hoping this will create a fog of war for the kids and force them to be more strategic.

This is a map of the table which is about 12 feet by 4.5 feet.  There are six towns on each side worth a set number of points.  These will be the objectives of the game.  The Russian towns are worth quite a bit more than the Prussian ones.  This is to serve as a handicap for the Russian players who are considerably outnumbered.  They will be on the defensive.  Points will also be awarded for destroying enemy brigades.

I am curious to see how this works our.  We have five days to play; three hours each day.  I'll be posting pictures as the week goes on, so please check in and follow along with us.

Thursday, June 30, 2016

Latest Commision

I have started on a wonderful commission I just received of about 250 figures, almost all plastics.  It took a lot of time to assemble these little devils, but my experience paid off and they turned out well.  But painting them has been a delight.  I have finished the Perry French dragoons and the Victrix Highlanders.  My client will be using them for Sharp Practice 2, so they are all individually based.


The natural sunlight is the best lighting to pick up the details and the shading.  Now on to 60 Victrix French Imperial Guard.

Wednesday, June 22, 2016

How I Made My Spanish Buildings

Someone on another site inquired how I made my Spanish buildings.  Here was my answer.  It may be helpful to someone, and I am happy to pass on my ideas to others.  After all, my ideas are based on what I have picked up from others.

I am a total amateur, Marc, and a cheapskate to boot. I basically used cardboard boxes to cut into the walls and roofs. Using pictures from the internet, I got ideas on how I wanted them to look and thought two inches per story was the right scale. I used super glue to put things together because it dries quickly and holds. Once the walls were together I drew in windows and doors. I then covered the structure with a mix of spackling, white glue which was watered down a bit. I was just looking for some texturing. The roofs were made by taking off one side of the exterior paper on the cardboard to expose the interior. I cut these into small strips and glued them into place. I am getting better at that with each go.
Once that was done I let everything dry overnight. The next day a spray painted in all in flat black. Once that dried, I did a liberal dry brushing in a fairly dark gray. Then I added some white to that and did a second dry brushing. Then a final dry brushing in white. For the roofs, I did a dark brown base, a lighter brown dry brushing followed by a final dry brushing of orange.
Another thing I learned as I went was to use scotch tape to cover the ends of the cardboard. The spackling mixture was to runny to actually seal the ends, and I didn't like the gaps. You can see the tape once the spackling and spray paint are applied.
Believe me, if I can do this, anyone can. And it's very inexpensive.

With the flaps, three sides are perfectly straight, so it makes things easier to line up correctly.

Walls and roofs are measured out, front and back walls first, then the side walls.  

These are the ingredients for what I use to add texture to the plain cardboard.

Here is what it looks like once I have mixed it all up.

Peeling away one exterior piece of the cardboard to expose the interior which I use for the roofing.

Cut into strips and placed on the piece to be used for the roof

Rather than cut into the walls to make doors and windows, I just outline them with match sticks.  I don't put my mixture where the doors and windows are.  This saves a lot of time and hassle trying to get things right with a hobby knife.
If you have any questions, please just leave a comment and I'll get back to you.

Tuesday, June 21, 2016

A few more additions to my Spanish Village

I am enjoying my first week of vacation.  Today I finished up yet another building for my Spanish village.  It was a simpler design and I realized that sometimes less is more.  I also made six more wall sections, one of which includes a gate.  The last pieces were road sections that total about 12 feet.  These are made of cardboard covered with a mixture of water, spackling and white glue and then sprinkled with some Woodland Scenics fine ballast.  This final touch would provide some definition so as to depict weeds on the roadway.

For very little expense and an enjoyable use of time I have been able to assemble a substantial amount of scenery to use with my 28mm collection.

The rear of the town and the church

cavalry entering the town

Warlord Games mule train

Newest house. Simple design, but effective.

The rear of the church and some new wall sections

The front of the new house, sporting light blue trim, and a glimpse of a new road section.
A British line ready for action
Here is a link to a brief video I have posted on Youtube.

Youtube video

Sunday, June 19, 2016

More 28mm Scratch Built Spanish Buildings

I have added yet another building and some more wall sections to my growing collection.  This time it is a house attached to a large arched entrance.  I particularly like the wall section that has a portion that has been destroyed.


Wednesday, June 15, 2016

Scratch Built Spanish Church

I finished the church.  I thought it was a little large initially.  But now that it's on the table with some figures around it, I think it will do the job.  I also finished some walls.  These are easy to crank out and add a lot of options to setting things up.  I purchased the ready-made trees from Woodland Scenics.  I added a little paint to the trunks and made individual bases for each one.  It's the least expensive way, both monetarily and time-wise to get a lot of trees in a hurry.