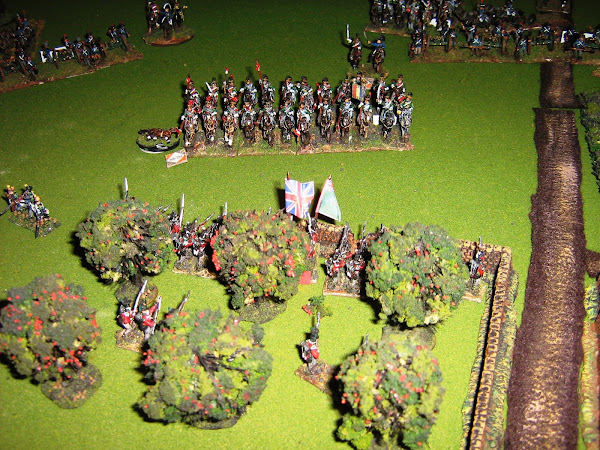
Thursday, April 16, 2015

The Battle of Shelbyville Part 3

Turn 8- At long last, Freeman sees the head of Herringshaw's column advancing steadfastly up the road.  A courier informs him that Karas's command is arriving as well.  Stiffened with this intelligence, he decides to lead the 6th NJ forward to but time for the reinforcements to cross the bridge.
Herringshaw's brigade enters the field
Freeman leads the 6th NJ up the slope to slow down Herringbone's South Carolinians
As hundreds of muskets blaze away, the rebels get the best of the firefight.  During the Confederates turn, Greene's battery of the Lynchburg Artillery takes up a firing position squarely on Freeman's flank.
The Lynchburg Artillery takes up position on the Union flank
Purdy continues to pull back his cavalry.
The end of turn 8
Turn 9-  Herringbone is determined to drive the Yankees back, so he leads his men forward in a splendid attack on the 6th NJ.  At first, the men from the Garden State resist fiercely (a tie in the die roll), but the weight of numbers finally takes hold and the gritty regiment is all but destroyed with 70% of its men either killed or captured.
The rebels counterattack

The situation at the end of turn 9
At the very end of the turn, the deadly 2nd NY Lt. Artillery fires yet another blast, this time at the disordered South Carolinians. A 10 is rolled, casualties are inflicted and Herringbone is killed by a shell fragment as he was trying to reorganize his victorious men (a 9 rolled on the officer casualty table.)  Also during the turn, the rebel artillery blasted Herringshaw's 3rd NY as it tried to get across the bridge.  The head of his column is stunned by this ferocious fire.

Turn 10- All is confusion at the bridge.  Both sides are trying to reorganize as quickly as possible.  Excitement surges through the Confederate ranks as news of Dinwiddie's arrival spreads through the ranks.
Dinwiddie's Mississippi brigade comes onto the field of battle
As both sides attempt to regroup at the bridgehead, tragedy strikes the Union command corp when General Herringshaw is killed instantly by a well aimed cannon ball.  Confusion is reigning at the hotly disputed bridgehead.

Karas continues to urge his men towards the rebel right flank.  This could be the Union's best hope of a victory.
Confusion reigns at the bridgehead.

Karas's command

Karas presses his men forward, seeking to take the rebels in the flank
At the end of turn 10, the issue is still quite in doubt.  All of the available forces are now on the field.  It is now a matter of who can seize the initiative and keep it.  The Confederates hold favorable ground, but the Yankees have the advantage in numbers.  Also, the Union artillery has had its way with the rebel guns despite a large disparity in guns.

Tuesday, April 14, 2015

Battle of Shellbyville Part 2

On turn four the Union brigadier Freeman pulls back his left flank, but on the right he continues to blaze away at Purdy's dismounted troopers.  Freeman's men get the worst of it.  The 6th Va fails its moral check, breaks, and routs to the rear.  Dodson limbers up the remains of his battery to take up a better position within the town.
The 14th RI pulls back

The firefight continues on Freeman's right, but he takes losses
On turn five, Freeman decides to forge ahead despite the fact that his supporting brigades are nowhere in sight.  The 2nd NY Lt. fires into the flank of the 4th Va cavalry and takes out two stands.  This is too much for the green troopers and they mount up and hastily retreat to the west. Purdy withdraws his regiments on the left.  An eerie silence falls upon the field of battle.
The 6th Va rallies

Dodson's new position

Purdy's men break off the action and pull back towards the town
Turn six- The 2nd NY Lt limbers up and pushes hard towards the hill to gain better firing positions as the 4th Va has routed from the field.  The 14th RI moves to support the NY battery.  The 6th Va rolls a one and breaks for the second time.
The 4th Va runs.

The 2nd NY Lt and the 14th RI seize the hill

The 6thVa breaks yet again

Purdy's men now line the road east of Shellbyville
Turn 7- Herringbone's South Carolina brigade arrives on the field and makes a rapid march to the front.  At the same time, Langston's two batteries rumble into Shellbyville.  The weight of numbers has definitely swung in favor of the South.  Despite this, Freeman pushes one of his regiments across the bridge to maintain pressure on Purdy's thin line.  From the smudges of dust boiling up to the east, it appears that Union reinforcements are finally at hand.  The question is, will they be in time? 
Herringbone's South Carolinians finally arrive.

Langston's guns make their appearance in Shellbyville
The last action of turn seven is the firing of the 2nd NY Lt at Dodson's battery.  The fire is accurate once again and the rebel battery is all but eliminated.
The final shots of turn seven. Dodson's battery is silenced and Freeman is able to push a regiment across the bridge.

Monday, April 13, 2015

Battle of Shelbyville

I have been working on commissions for most of my hobby time, so it was time to set aside the brushes and treat myself to a wargame.  I hadn't played Regimental Fire and Fury for awhile, and I have enjoyed these rules for solo actions.  This game was a struggle for the town of Shelbyville in the the heartland of Virginia.  It is, of course, fictional as are the orders of battle. 

This scenario has Purdy's Virginia cavalry brigade guarding the approach to Shelbyville from the east.  Scouts have returned alerting Purdy to the fact that a Union infantry division is on its way to destroy the town, which is a vital supply source for the Army of Northern Virginia.  The cavalry general has sent out couriers to press for reinforcements, but until they arrive his four regiments and Dodson's three sections of guns are all that there is to defend the town with. (All of the remaining units to be engaged rolled a d10 to see when they would arrive on the field.)

Purdy's right flank

Shelbyville

Shelbyville, with Purdy's defenses in the background

  
The western side of the table. No sign of reinforcements
The game began when Freeman's New Jersey brigade arrives on turn 1.  He is rather new to command and foolishly advances up the main road in march column.  Dodson's experienced artillerists give the 4th New Jersey a very hot welcome. (the battery rolled a 10, which was withering fire, but one section is now low on ammo.) Freeman's other 3 regiments march away from the road to form a line of battle.  The Union general wasn't expecting such a hostile reception.
Dodson's battery opens the battle and draws first blood
The 4th NJ loses two stands
Fortunately for Freeman, the divisional artillery, a battery of heavy rifles, is right behind him and should be able to take on the rebel guns.  With this confidence, he rallies the bruised 4th and sends the other 3 regiments forward.
The 4th VA hiding in the woods

The 6th VA behind its hasty works.

Freeman's right flank moves into position to engage the rebel line.
On turn three things really got going.  The Union artillery set to challenging Dodson's guns and the Union line of battle marched stoically into position to begin dueling with the gray-clad cavalrymen.  Dodson's battery was able to take out another stand of the 4th NJ, but the shotguns and hunting rifles of the cavalrymen did no damage to the Yankee soldiers.
Dodson's guns feeling the wrath of heavy rifled guns

The lines begin blazing away at one another.

On the Confederate left, a lot of noise but little damage done.
During the Confederate half of the turn, Purdy sprung his surprise.  The 4thVA had concealed itself in a thick wood.  While the 14th Rhode Island was fully occupied with firing at the 6th VA, the 4th moved out of its hiding place to deliver a stunning volley (rolling a 10).  This took out two stands of the 14th RI and disordered them.  But the 6th VA suffered significant casualties in the preceding firefight.  Purdy anxiously looked over his shoulder, but all of the approaches from the west were void of butternut columns.
The 4th VA's surprise

The 14th RI and 4th NJ have lost heavily
After three turns the rebels have managed to hold their line, but it is clearly an uneven fight and Purdy will need to concede his first line of defense and pull back closer to the town.  How much longer will he be able to hold out?  And Freeman is wondering where the rest of the division is.  Surely they can hear the sounds of battle.  Why aren't they rushing to his aid?  To be continued.

Friday, April 10, 2015

A new generation of gamers


I got to spend some time with my oldest grandson this past week.  I took along some Napoleonic artillery that I painted up for him.  He thoroughly enjoyed it and we played a few games.  We also put together some simple terrain to enhance the experience.

We developed some simple rules using one die to determine the outcome of individual combats.  It was fun to interact with him.


Friday, March 27, 2015

Flames of War- Free for All

Our wargaming club a school fought out a Flames of War scenario.  It was our first go at actually playing with forces broken into points and a clear scenario.  Our game was to last up to six turns unless the victory conditions were met before that.
An overview of the table.

A closeup of the table center
The Americans won the die roll and were to be the attackers.  Objective markers were placed on the enemy's side and the platoons were deployed.  The Americans were heavy in armor and had some veteran paratroopers.  The Germans only had three Stugs, but their infantry was all veteran and had anti-tank guns and veteran infantry.

On turn one, the Americans advanced aggressively across the table.  These were commanded by our  younger players, less experienced players.  Their youthful boldness would prove to be a problem.

The American side.  A German objective can be seen in the middle right of the picture.

The German side.  The two American objectives can be seen in the upper right of the picture.
On turn two things started to pop, literally.  An American tank platoon came down a road and into the open hoping to take out the anti-tank guns.  This was not successful.  In the German half of the turn, the guns destroyed on Sherman and bailed another.  To the left of this, the American command tanks came into range of the Stug platoon.  The U.S. shots bounced harmlessly off of the German armor, but the 2IC tank was destroyed by return fire.  Additionally, the second American tank platoon had two of three tanks get bogged down trying to cross a hedgerow.  This hasn't been a good start.

How things stood after turn two.
On turn three, the more experienced German commanders seized the initiative by advancing one infantry platoon through some woods to get to an objective and sending the other to engage the marooned Shermans hung up on the hedgerow.  The Americans were able to take out an anti-tank gun, but that was about it..

Turn three.  The Stugs get into the flank of the command tanks.
On turn four things really went the Germans' way.  One infantry platoon was close to reaching an objective marker and another U.S. tank was taken out by panzer schrecks.  Only an incredible die roll (two sixes) saved an American tank from a flurry of fire.  But the command section had to test morale and failed.  One American unit was out of the fight.

German infantry takes out a tank.

Another German platoon threatens an objective marker.
Turn five was dramatic.  The Americans were able to move a lone tank, supported by the paratroopers, towards the threatened objective.  The tank sprayed the Germans with machine gun fire and scored enough hits to pin them.  This followed up by an assault by the paratroopers.  The bloody hand-to-hand combat saw the German platoon destroyed and the American one forced to break off.  But the tank rested squarely on the endangered marker.

Turn six saw the game come to an end.  As the desperate struggle for one objective came to a conclusion, the Stug platoon was able to advance unmolested onto the other.  There was nobody left on the American side to stop them.  The Germans had scored a 5-2 victory.  More importantly, everyone had a great time.  We were finished within two hours.

It was our first real attempt at using the assault rules.  I am sure we made some mistakes, but we were close enough that it seemed to work out as it should have.
Friday, March 20, 2015

Latest Addition

I just finished basing three more units of Victrix figures: two French light battalions and a large British regiment.  My collection has gotten rather large and I am running out of display space.  I truly enjoy painting at this scale. 


Sunday, March 15, 2015

More Victrix

I took the plunge and purchased the 72 paint set from Vallejo.  I got a good deal online and figured that I do enough painting now that it justified the expenditure.  The variety of colors makes shading easier and much more consistent.  My first project was a box of Waterloo British flank companies.  The brushes included in the set have been a tremendous bonus, allowing me to paint with finer detail.  I am pleased with the results thus far and look forward to learning how to use this new resource.